Thursday, September 6, 2012

Meatball Calzones

Thursdays are a mess. I get off work at 7am after a 12 hour nightshift, try to nap a few hours (not happening with a 4 year old) and head to a 1:00 pharmacology class. 9 times out of 10 we "junk it" on Thursdays. Today: I planned ahead. *brushes shoulders off*

I put my favorite pizza dough recipe in my bread machine on dough cycle before I headed to class. By the time I got home from class and picking the twins up from school it was gaw-geous. (that's southern for "gorgeous" in case you don't read southern twang)


I'm super cheap and bought this marinara last week when it was on sale for $.89 (actually I bought 3 cans..... cheap is cheap- right?) 


The meatballs were also on hardcore sale (BOGO free and I had $1 off coupons, so I paid $1 and some change per bag).   The cheese- semi sale....but oh wells.


So I pinched a good bit of dough off, rolled it out and put the fixins on.  This pic is from the ones I made for the boys.  Big Daddy's calzone had sauteed onions and bell peppers on his.


Mine: vegetarian style....sauteed zucchini (did I spell that right? I'll spell check later) I got from the farmer's market last Friday.


I folded the top over, pinched the sides and got fancy.  I brushed olive oil, sprinkled Italian seasoning and the 5 cheese Italian blend on top.  Bake and devour.


Recipe Roundup:

Pizza Dough

2 1/2 cups flour
1 Tbs yeast
1 Cup warm water
1 tsp salt
1 tsp sugar
2 Tbs oil

Mix together and let rise in a warm area. (I put mine on dough cycle in the bread machine)

Calzone
(Preheat oven to 450)

Roll out pizza dough.  Spread marinara leaving a small border to pinch sides together once folded. Put whatever else your little heart desires in the middle. Today I put Italian meatballs (cut in bite size pieces) sauteed onions, bell peppers and cheese. Fold the top over and starting at one end, pinch sides over each other all the way around.  Brush olive oil lightly on top, sprinkle with Italian seasoning and a little bit of cheese.

Bake at 450 degrees for 12 minutes (depending on size) Keep an eye on it, the cheese started browning quickly and after 12 minutes the dough wasn't quite finished so I covered the pan with tin foil and cooked another 5 minutes. You could omit the cheese on top (I just did it to be fancy shmancy)

Friday, August 3, 2012

Heeeeeey Macaroon(a)

Get it? (lame, I know) I know you sung that blog title. (you ain't gotsta lie, Craig)


Enough with the 90's song/movie shout outs.


I've had these beauts hanging in my pantry for a while now waiting on the perfect recipe.


That happened today as I was watching Barefoot Contessa. (woot, Ina!)  She made these coconut macaroons that looked ahmaaaaaazing.  She didn't dip them in chocolate or anything. Why? I don't know- maybe she forgot.  Anyways...


(There's no need for a step-by-step picture log of making a box brownie.  My 9 year olds can probably do this unassisted).  So I mixed it up, and popped it in the oven for 10 minutes. (next time, I'll bump it to 20)


Let's make the macaroon mix using THIS recipe.


(oh god.....condensed milk....coconut.....) Add 1 tsp. vanilla.

Beat 2 egg whites with salt.


Fold in the egg whites and you've got a pretty kick-a macaroon mix.


Here's where my planning took a turn south.  In my head, I pictured the coconut mixture spreading over the brownie mix better than it did.  Adjustments will be made next time...I think the brownie needs to cook by itself longer than I allowed.


Pop this in the oven till it comes out looking like this:


Let cool, cut and drizzle with chocolate.


*I die*  You'll need an extra, EXTRA tall glass of milk. (And maybe some insulin) These bites of heaven are RICH.


Recipe roundup:


Coconut Macaroon Brownies:


1 box of brownie mix made according to instructions.  Bake at 350 for 20 minutes and pull out of oven.


Coconut Macaroon: (Recipe from HERE)
  • 14 ounces sweetened shredded coconut
  • 14 ounces sweetened condensed milk
  • 1 teaspoon pure vanilla extract
  • 2 extra-large egg whites, at room temperature
  • 1/4 teaspoon kosher salt
  • Combine the coconut, condensed milk, and vanilla in a large bowl. Whip the egg whites and salt on high speed in the bowl of an electric mixer fitted with the whisk attachment until they make medium-firm peaks. Carefully fold the egg whites into the coconut mixture.
    Spread this mixture over the semi-cooked brownies and throw back into the oven for 20 minutes or until a toothpick comes out clean from the center of the pan.  (If coconut seems to be browning too fast, cover with tin foil loosely)

    Thursday, July 12, 2012

    Freezer Patties

    So I work every weekend of my life.  Because of this I have to plan ahead and have meals that the hubs can easily do.  Let's face it- the man can grill but cook, he can not.  I'll assemble casseroles, crock pot meals and some side dishes for him and leave instructions for cooking.  One thing we love to keep stocked in the freezer is hamburger patties.  I always have buns in the freezer when I buy them on sale, so if all else fails and I haven't planned a meal out or forget to set something out he can pull buns out in the morning and grill the patties.

    (sorry for the juicy picture, I forgot to take a pic before I started using it)

    Here's the patty maker I use (thanks mom!)


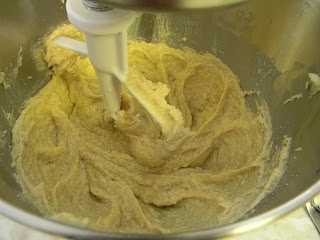
    I had 3.61 lbs of ground meat I bought on sale that I used.  Threw the meat and the ingredients in my stand mixer to combine the ingredients. (I hate mixing meat by hand. *ew*)
    (totally forgot to snap the pic earlier....this was after almost all the patties had been made. but you get the point)

    The mixture made 13 patties.  I used gallon size bags and fit 4 per bag....then froze.


    There ya go!

    Recipe Roundup:

    Hamburger patties:

    2 lbs ground meat (yeah, yeah I had more...it was on sale)
    2 eggs, beaten
    4 tablespoons hickory BBQ sauce
    1/2 cup finely chopped onions (I didn't measure mine...I just chopped a small onion)
    1/2 cup bread crumbs (I used unseasoned)
    3/4 tsp garlic powder
    1/2 tsp salt
    1/2 tsp pepper


    Tuesday, June 19, 2012

    "the best cooker ever"....

    Every night when we sit down for dinner my 4 year old rubs my arms, face, gives kisses and tells me "Mom, your the best cooker ever!" HaHaHa- poor kid.  I am FAR from a good cook much less the "best cooker ever".
    You know those "let's clean out the fridge" nights?  That was tonight.  Kenny set out some chicken&pork sausage this weekend that he planned on grilling but didn't.  I had a few squash in the fridge that needed to be cooked before they went bad. (I HATE throwing things out before they've been used).  So I decided to make meatloaf, squash casserole, mashed potatoes and yeast rolls that I had come across on pinterest today.


    "Meatloaf"


    Sweat some onions out and add garlic.


    While that's happening, mix your meat together and add the goods.  (This is the part that absolutely churns my stomach as a vegetarian. Squeezing out sausage from the casings is the last thing on my "to do" list).
    (just noticed the sausage looks quite unappealing.......oops)

    I don't know what you put in your meatloaf but this is what I put in mine


    My man Alton Brown has a pretty kick tail way of shaping a meatloaf and ensuring even cooking.  You'll need a loaf pan and some cooking spray. Spray your loaf pan and pack in your meatloaf.  Transfer that to a slotted broiler pan and voila!!  Perfect meatloaf form.


    I mixed brown sugar/ketchup/Worcestershire sauce and brushed it on top after 30 min of cooking.


    Zee finished product:


    Okay so here's where I had PLANNED on posting nice step by step pics of my squash casserole and dinner rolls but they both were major whomps.  I don't go by recipes when cooking, I make them up in my head- and the squash casserole that I was counting on tasting like the one I had at work yesterday (yes, I said work) was more of a stewed squash with cheesy water substance. What the world.  I'm permanently deleting that slop from my memory.

    On pinterest earlier today I found this recipe.  I also took awesome step by step pics, let's review:

    Mix your water/oil/yeast like the recipe calls for and wait 10 minutes for the yeast to get foamy.

    I added the rest of the ingredients like the recipe called for.  The recipe ALSO said the batter would be gooey.....so I thought "okay, no problem. Mine's looking REAL gooey".  It then instructs for you to spray your hands with cooking spray and form 12 balls.  Um......


    Gooey wasn't even the word for it. This was like the stickiest yeastiest pudding EVER.  It wouldn't even remotely form ANYTHING.  So I used my thinking cap and just threw the dough (batter?) into a muffin tin.  Re-read the recipe and found my error: I used 2 1/2 cups of flour instead of 3 1/2. DUH. *face palm*  but in my defense I was OUT of flour.  So yeast muffins (what the heck?!) it is.

    And this ladies and gentlemen is what happens when you dine at the "best cooker ever"'s (did I do that right?) house:

    A delicious plate of meatloaf, mashed potatoes, squash topped with cheesy water and a yeast muffin on fine china.


    Friday, June 15, 2012

    There's a first time for everything...

    If they don't come in a tube or layed out pre-cut I ain't bakin' it. (insert southern twang here).  I came accross this gem today that I had forgotten I had.  First recipe listed: Original Nestle Toll House Chocolate Chip Cookies. *sold* Let's do this.


    I can line my ingredients up like a cool blogger/baker. (sike- nevermind the baking powder. Totally didn't need it. And also- yeah that's a window unit affixed with duct tape. It's South Carolina people. It get's 100 degrees. This ain't an issue of Good Housekeeping).


    I sifted my dry ingredients. Not because the recipe called for it, but becuase that's what Ina Garten does and she's awesome.


    Aw hell, Ina also says to make sure your eggs are room temp. No problem- she said to put them in a bowl of warm water to temper and problem solved.


    Beat butter, sugar, brown sugar and vanilla.  Add eggs one at a time.


    Add that flour/baking soda/salt in slowly.


    2 cups (or of course more if you really, REALLY like chocolate) semi-sweet morsels.
    Note: I may or may not have eaten a few...


    I got fancy and used a melon ball thing to drop my cookies with. (so fancy I don't even know the proper name?!) A small(er) ice cream scooper so-to-say.


    I think being "fancy" ruined my first ever from "scratch" cookies.  Maybe my melon baller was too small?  My cookies look NOTHING like the front cover of my book and were too thin in my opinion.  I even tried a cookie sheet for my third batch and got the same results.  They tasted good though, just not thick enough.


    These fail the "break in half and watch a chocolate morsel's gooeyness stretch" test.
    They tasted great.....great and crunchy, if that's your thing. I like mine soft and chewy.  I'm on the market for a slightly larger melon baller/ice cream scooper thingi.


    Recipe Roundup:

    Original Nestle Toll House Chocolate Chip Cookies

    2 1/4 cups all-purpose flour
    1 teaspoon baking soda
    1 teaspoon salt
    1 cup butter, softened (2 sticks)
    3/4 cup granulated sugar
    3/4 cup packed brown sugar
    1 teaspoon vanilla extract
    2 eggs
    2 cups (12-oz package) semi-sweet chocolate morsels
    1 cup chopped walnuts (I omitted these)

    Combine flour, baking soda and salt in small bowl.  Beat butter, granulated sugar, brown sugar and vanilla in large mixing bowl until creamy.  Add eggs one at a time, beating well after each addition.  Gradually beat in flour mixture.  Stir in morsels (and walnuts if using).  Drop by rounded tablespoons onto ungreased baking sheets.
    Bake in preheated 375 degree oven for 9-11 minutes.

    This recipe makes about 5 dozen cookies.

    (I baked 3 batches and have a huge amount left over to roll out into a log and freeze.  Logs can be stored in refrigerator for up to 1 week or in freezer for up to 8 weeks.


    Wednesday, June 13, 2012

    "Pizza Bites" and the infinite baking endeavors

    (Let's hear it for my first EVER blog entry!)
    Shout out to my shins....who are screaming at me right now. It's 8:51 pm and I've just sat down after an entire day of baking, running at the boys' school, errand running and back home to cook dinner/bake more. This chick is glad to be sitting down.  So now to the good stuff. 
    Today I made some cinnamon rolls using this recipe. I'm fortunate enough to own a bread machine so I follow her instructions to a "T".  The only thing I do differently is add more cinnamon than the recipe calls for (last time I made them you really couldn't taste the cinnamon).  I baked a pan for us to eat in the morning and froze 11.  Here's how I freeze them: (crap, should have taken pics...sorry) grease a sheet pan with butter so they wont stick. 
    Lay individually cut cinnamon rolls on your sheet pan and throw into the freezer.  Once they are frozen pull the pan out and using a spatula pop them off the pan, place into a freezer bag, let the air out and freeze.  When you are ready to bake just put them on a greased pan (round ones work best...like cake pans), cover with saran wrap and let sit in the fridge over night.  Bake as directed.

    I also made my hubby some breakfast burritos using this recipe.  I don't follow this one to a "T" I change it up a bit....(more on these on a later post). 

    I had some wild hairs up my rear and decided because all 4 of my boys are eating me out of house and home I needed to come up with some quick "go to" snacks. (yes we have fruit. they will eat a bunch of bananas in a day. Let's not forget the pint of strawberries I brought home the other day. R.I.P.) 
     I concocted up "ham and cheese" bites and "pizza bites".  I use this recipe ALWAYS for pizza dough. It's easy as popping open a can of pre-made dough (well, ALMOST) and it tastes delish! (don't worry, I'll have pictures of this process in a bit)  So I made a batch of the pizza dough and chose to make "ham and cheese" bites since I had lunch ham on hand.  I used my pastry cutter (pic to follow) and divided out small pieces of dough.  After I rolled out each piece, I put a little bit of shredded cheddar and chopped ham in the center and folded the outer edges around itself so that the dough completely covered the contents. I'm a horrible blogger and didn't write down how long I baked them. 8-O But I did bake them until they were slightly golden on top and they look like this:


    Put them on a cooling rack and let cool COMPLETELY.  I threw them all in a ziploc bag to freeze so the boys can pull out a few and pop in the microwave.


     (Since this is my first time EVER making these, I have no clue how long to "nuke" em for....again- I'm a horrible blogger)

    Moving along to the "pizza bites"...Kenny said they don't taste like pizza but they are good and Andrew said they don't either but they are the "best thing I've ever made" sooooooo....they must be legit.  I couldn't tell you because I don't eat meat.  So here we go:

    Get you a cup of warm water and dissolve your yeast:


    Add all of your ingredients in your mixer with the hook attachment:
    (side note: the recipe shows her using a bowl and wooden spoon. I've done this in the past but it's aggravating and then you have to worry about kneading it and it sticking....yadda yadda. So trust me, use your mixer.)

    Make sure you don't mix it too fast- if so it will throw the dough to the walls of your bowl and make a sticky mess.  I mix mine on low, low/medium until it forms a ball on your hook:


    Flour your hands and pull the dough off the hook. Use regular non-stick cooking spray to spray the inside of the bowl and add the dough back rolling it around the spray until it's covered in oil.

    Cover with a towel and let it rise in a warm place. (I just set mine on top of the dryer while it's running)  The recipe states you don't have to let it rise, but even if you have 5-10 minutes to let it rise, I think it works better.  It will look like this:


    While my dough was rising, I browned some hamburger meat and added in some marinara.  (I was out of pizza sauce. Don't worry, I'm making this up as I go, ya know?)  Also, I don't need the grease police on my back.  So what if I forgot to drain the meat?! I PROMISE I drained it after I added the marinara.


    I'm a firm believer in a well floured surface....


    So I rolled my dough out and cut circles using a cookie cutter.


    I stuffed the little circles of love into a mini muffin pan:


    Gather your scraps up with a pastry cutter and knead back into a ball. (If I can do this- you can.  Kneading is NOT my cup of tea)  Roll it out and cut more circles of love.


    I popped the pan into a 425 degree oven.  Peeked in after two minutes to see this:


    HOLY CRAP MY CIRCLES OF LOVE LOOK LIKE BUTTHO- (!!!) Needless to say I didn't plan on  THIS happening.  No worries, I just used my fingers and spread the dough out (again).  I used a measuring teaspoon at filled each cup with the meat mixture.


    Baked them for 8-10 minutes then added some cheeeeeeeeeeeeeeeeese. 


    Finished product!  Let them cool completely and then shove in a freezer bag (unless they get eaten before hand)


    Recipe Roundup:

    "Pizza Bites"

    this pizza dough
    1 lb ground meat
    1/2-1 cup of pizza sauce (marinara)
    Mozzarella cheese

    Preheat oven to 425.

    Mix pizza dough and let rise.  Brown hamburger meat, drain.  Add pizza sauce and let simmer 5 minutes.  Once dough is ready, roll out onto a well floured surface and cut into small circles using a cookie cutter.  Spray a mini muffin pan with non-stick spray and place each dough circle into the muffin tins.  Bake for 2 minutes.  (dough will most likely rise and look ....well.....like you've done something wrong) Take them out of the oven and CAREFULLY using your fingers press dough back out  to the sides.  Add 1 tsp of the meat mixture into each and put back into the oven for 8-10 minutes.  Take them out one more time (i know.....time consuming) and add shredded cheese, bake for another 3-4 minutes.

    Place the bites onto a wire rack to cool.  If freezing, allow them to cool COMPLETELY before placing them into a ziploc bag.


    (It's 10:43 pm. That took entirely too long. In my defense, I had to get up and fuss at churen 4839205732 times and take my contacts out)